(2학기에 사용한 내용 정리)
우선 사용하는 기기에 vscode와 git을 설치해준다.
1. Visual Studio Code 설치
https://code.visualstudio.com/
Visual Studio Code - Code Editing. Redefined
Visual Studio Code is a code editor redefined and optimized for building and debugging modern web and cloud applications. Visual Studio Code is free and available on your favorite platform - Linux, macOS, and Windows.
code.visualstudio.com
2. Git 설치
Git - Downloads
Downloads Mac OS X Windows Linux/Unix Older releases are available and the Git source repository is on GitHub. GUI Clients Git comes with built-in GUI tools (git-gui, gitk), but there are several third-party tools for users looking for a platform-specific
git-scm.com
Git을 설치했으면 환경설정을 해줘야 한다
바탕화면에서 마우스 우클릭을 해주면 다음과 같은 창이 뜬다

Git Bash Here을 클릭한 후 Git Bash 쉘에서 사용자 설정을 해준다
$ git config --global user.name
$ git config -- user.email
설정을 완료했다면 이제 vscode에서 git을 사용할 수 있다
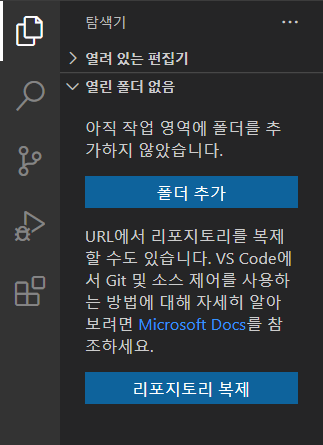
설치와 환경 설정을 완료한 후 VSCode를 실행하면 다음과 같은 화면이 뜨고
작업영역에 폴더를 추가 하면 된다
폴더를 추가 한 후
세번째 아이콘을 누르고 리포지토리 초기화를 누른다

1. 작업 영역에 추가한 폴더 내에 .git 폴더 생성
2. 폴더 선택 -> 원하는 폴더에 .git 폴더 생성
위와 같은 단계를 완료하면 버전 관리를 할 수 있게된다
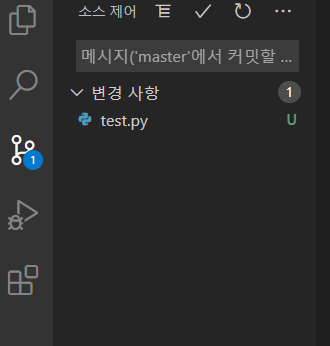
이렇게 계속 변경 내용이 checking 되고

test.py를 누르면 구체적인 변경 내용도 확인 가능하다
메시지와 함께 커밋을 할 수도 있다.
(2학기에 프로젝트를 하며 커밋 메시지가 중요하다는 것을 깨달았다)
'개발환경 > Visual Studio Code' 카테고리의 다른 글
| [Git] 레포지토리명 변경하기 (0) | 2023.05.31 |
|---|---|
| [오류] nodejs 설치 시 오류 (0) | 2021.02.08 |

댓글